Install PhpMyAdmin On A Raspberry Pi
Raspberry Pi and phpMyAdmin
This post is a follow up to my previous instruction, configuring a Raspberry Pi web server which covers loading the Apache web server and MySQL database management sy![]() stem. phpMyAdmin is a free tool that has been designed to allow for easy administration of MySQL via a browser. It is used in many web server environments throughout the world.
stem. phpMyAdmin is a free tool that has been designed to allow for easy administration of MySQL via a browser. It is used in many web server environments throughout the world.
To configure the RPi I am assuming that you are running the latest version of Raspian and have the ability to connect to your Pi either through SSH with putty and FTP with filezilla, or directly with a keyboard and monitor, if you haven’t set-up your RPi yet then check out my getting started section.
To install phpMyAdmin on a Raspberry Pi we need to import and activate the following package
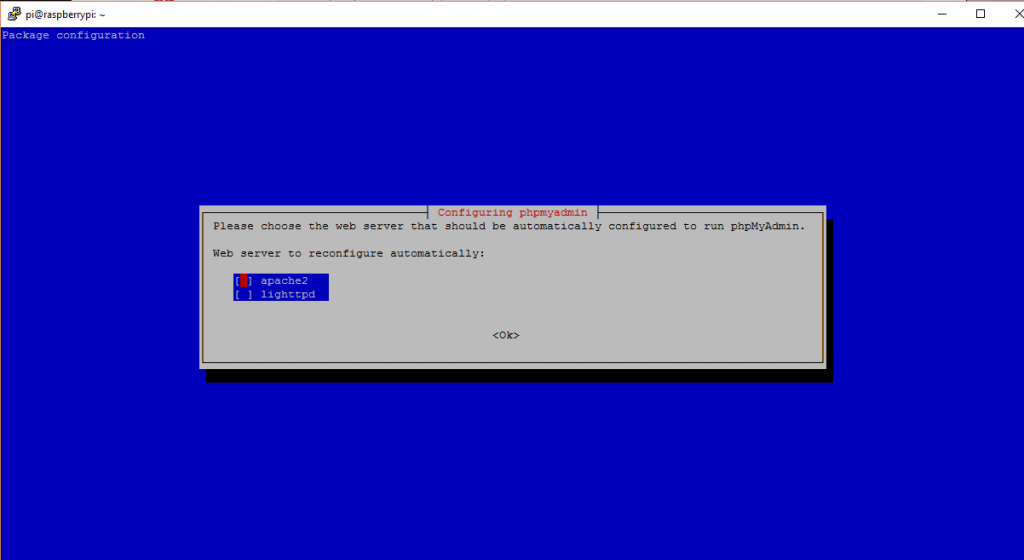
During the install you will be presented with the following screen asking what type of server you are running, select apache2 and continue
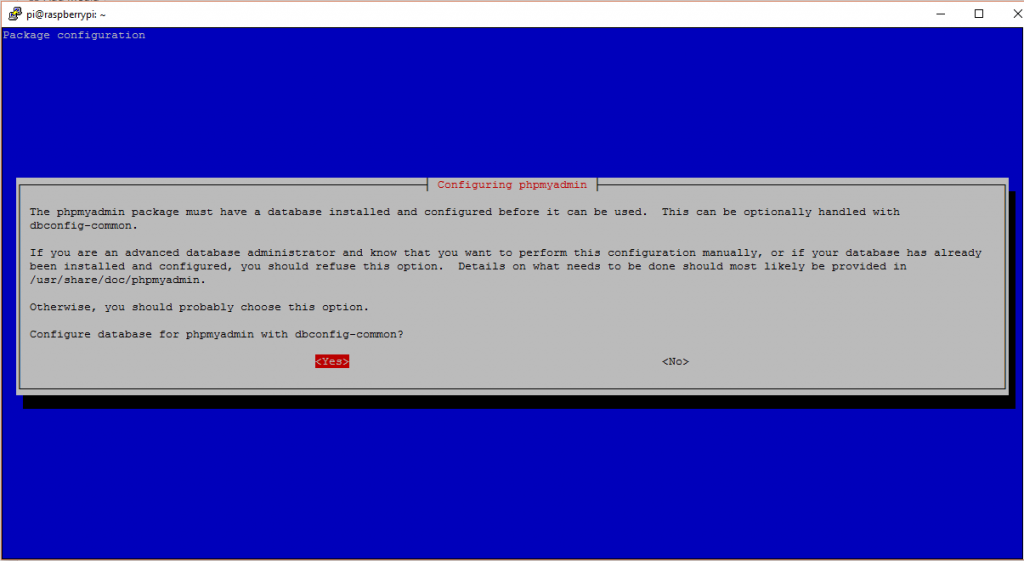
Next we will need to configure phpMyAdmin to connect a database. If you have already created a database you can just select Yes and continue, if not then go back to my Web Server configuration post and install MySQL.
When requested use the password for your MySQL database that you created during the Web Server configuration post
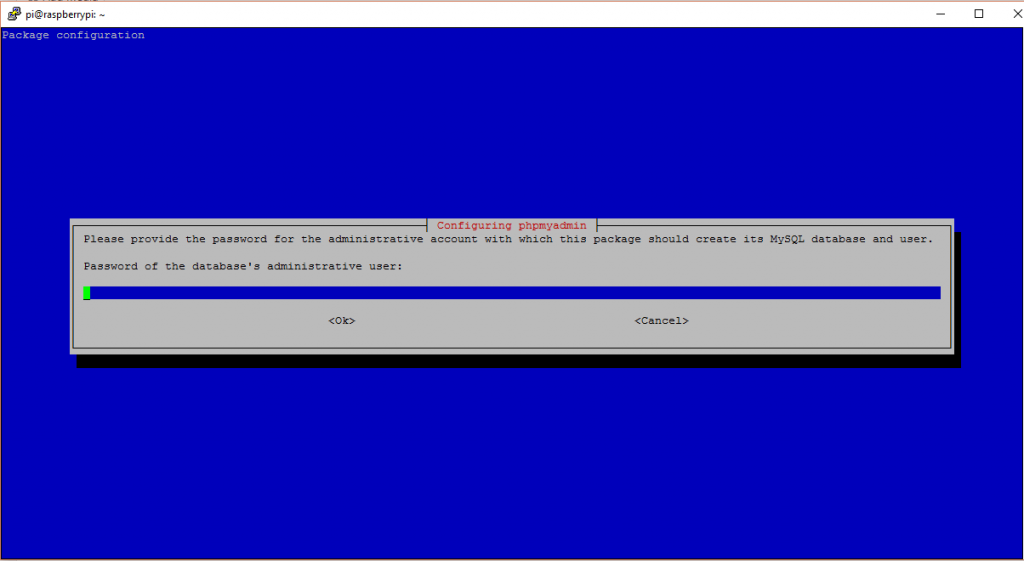
You will now be requested to provide a phpMyAdmin password and reconfirm, you can either use the same password as your database or choose another just make sure that you remember what it is otherwise you will not be able to log in.
With phpMyAdmin now added we need to go back to the Apache server and let it know about the new installation, to do this we will need to edit the apache2.conf file on the RPi with the following commands
Scroll to the bottom of the file and add the following line
Press Ctrl+X, Y and enter to save the changes. Next we will restart the Apache server to activate our changes
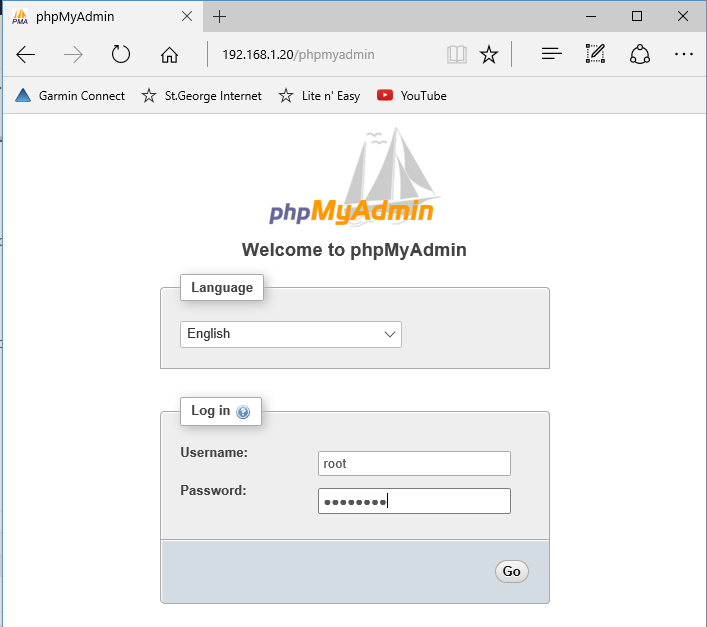
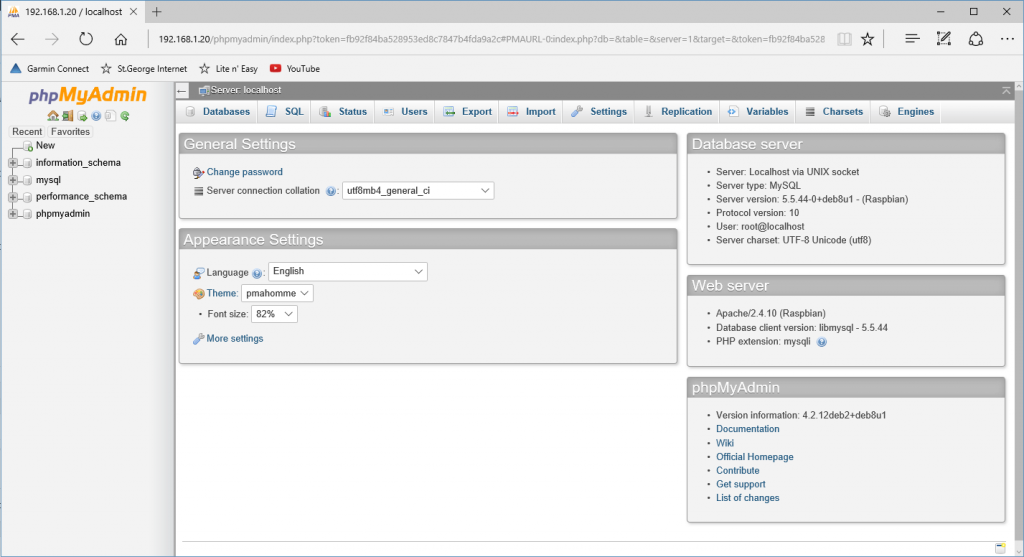
After the server has restarted open up a browser session and in the address bar enter your IP address followed by phpMyAdmin, eg. 192.168.1.20/phpmyadmin, You will be presented with a login screen where you enter the user as root and your MySQL database password.
who
Now that phpMyAdmin has been installed you now have a visual interface to your database, If you would like to learn more about MySQL and the commands to manage the database then I recommend the folks over at guru99.com who offer a wide range of excellent SQL tutorials all for free.
If you have any thought’s about this article, improvements or errors let me know in the comments below and if you found this helpful, why not share it with others.
I would have to read your other article such as the Raspberry pi web server and your getting start page but this all seems interesting. As I said in another comment I am looking to get into working with the Raspberry pi and learning everything I can about what they are capable of doing. Your instructional posts are very detailed, easy to understand and follow. Do you have a youtube channel?
Thanks Salvatore, glad you found it useful, no youtube channel yet but maybe in the future.
I love the fact that it’s so easy to download and start the phpMyAdmin installation as a simple command in the terminal.
Raspberry pi has really changed the way that we look at computers. Crazy how you can have a fully functioning web server in a small device as a pi.
I really like phpMyAdmin as well but I often use MySQL workbench to handle my mysql database.
It’s a standalone program and not run in the browser. Have a look at it if you want.
Thanks
Thanks Marcus, i’ll definitely look into the MySQL workbench anything that makes working with a database easier i’m all for.
Thanks for the fantastic yet easy to follow tutorials. But I noticed one small detail that needs to be changed on this page: in the last step you are prompted to log into phpMyAdmin. To log in, the username needs to be “root”, but the password that needs to be entered depends on whether the passwords for MySQL and phpMyAdmin are the same or not. If they are different, use the password for MySQL.
I had about five minutes of “But…but… I followed all the directions and everything worked perfectly up to now! Why do you suddenly hate me, tiny Pi computer? Why?”
That’s what I get for using different passwords on everything. ?
Hi Rob
I try and write these processes down as I go through doing them myself but there’s always that chance that I am going to miss something. Really appreciate you taking them time to highlight this to me, should be all fixed now.
Regards
Dom
Hi, great tutorial, but I have a problem: I have a 404 response from my browser, how can I solve?
Hi Pippo
404 errors can happen for a range of reasons but my first guess would be to ensure that the apache2.conf file is updated correctly, if that doesn’t help then just contact me directly and I’ll try and help you out.
Hi Dom,
I am also getting the error 404 page. I have successfully opened the apache web server, and then the edited php page. I think I could possibly be inserting the edit to the apache2.conf file incorrectly (or possibly in the wrong apache2.conf file?), however I am uncertain. Could you possibly walk through to the location of the file that needs editing? Thank you again. -A
Hi Amber
Reading back over the instructions it does seem a bit vague, try editing the apache2.conf file using the following command
sudo nano /etc/apache2/apache2.conf
If it still isn’t working and you know the webserver is showing the php page then it seems there might have been a problem with the installation of phpmyadmin itself
Hi Dominic,
when entering the command sudo /etc/init.d/apache2 restart , i found that the output was failed. do you have any idea what’s going on? thank yoou!
Without knowing more information I’m not sure I can help, email me directly from the contact page and I’ll see if I can help you out.