Configure A Raspberry Pi Web Server
Raspberry Pi LAMP Web Server
Configuring a Raspberry Pi Apache Server has the advantage of allowing you to host your own webpages. Out of the box Raspian does not have this configured to ensure that the operating system is as small as possible so we will need to add some packages. We will be creating what is commonly know as a LAMP stack, Linux, Apache, MySQL and PHP, by adding these 4 items we then have the ability to host webpages either within your home network or with the addition of a domain name and a Domain Name Server (DNS), to the word wide web.
To break down the packages of the LAMP stack:
- Linux – In the case of the Raspberry Pi this is most likely going to be Raspian Jessie
- Apache – is a popular web server application that can serve HTML files over HTTP
- MySQL – provides the database engine for your web site allowing us to store information such as sensor readings
- PHP – is a popular scripting language that allows us to serve dynamic webpages, It can present your webpage in a different way depending on circumstances.
To configure the RPi I am assuming that you are running the latest version of Raspian and have the ability to connect to your Pi either through SSH with putty and FTP with filezilla, or directly with a keyboard and monitor, if you haven’t set-up your RPi yet then check out my getting started section.
Apache Web Server
First we need to download the apache web server package, to do this log into your RPi via ssh and enter the following command
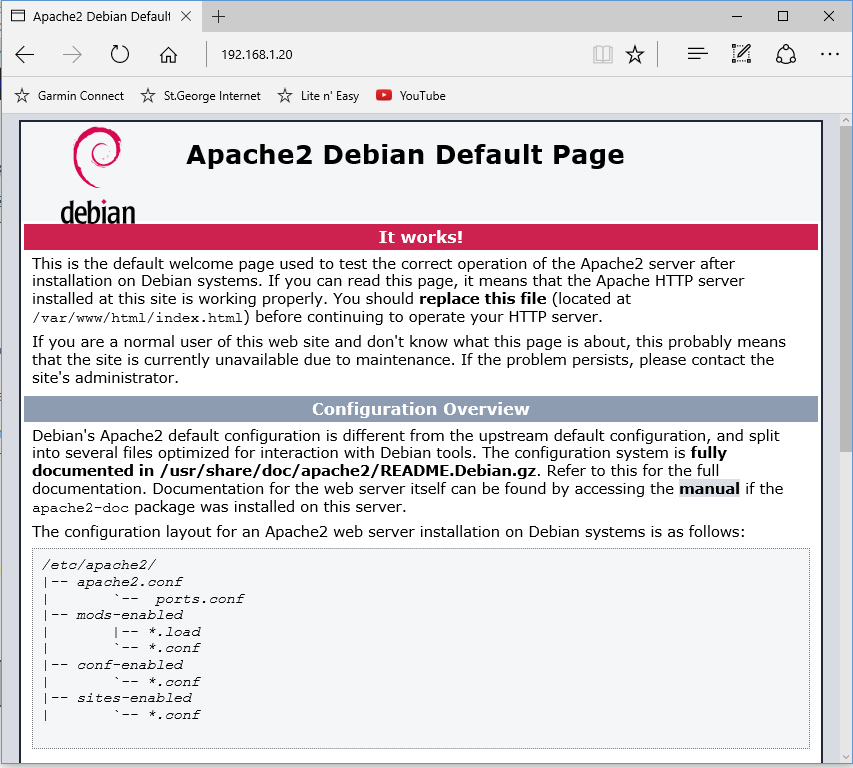
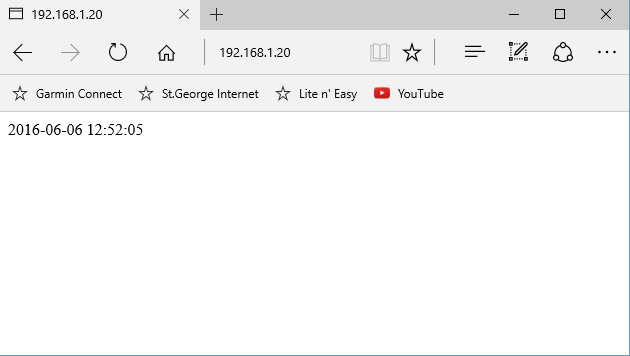
Once this is complete we can check that it has been successful but accessing the initial welcome page that it has created. Open a web browser and in the address line type “http://192.168.1.20” (enter the address of your RPi). This should present you with the following page.
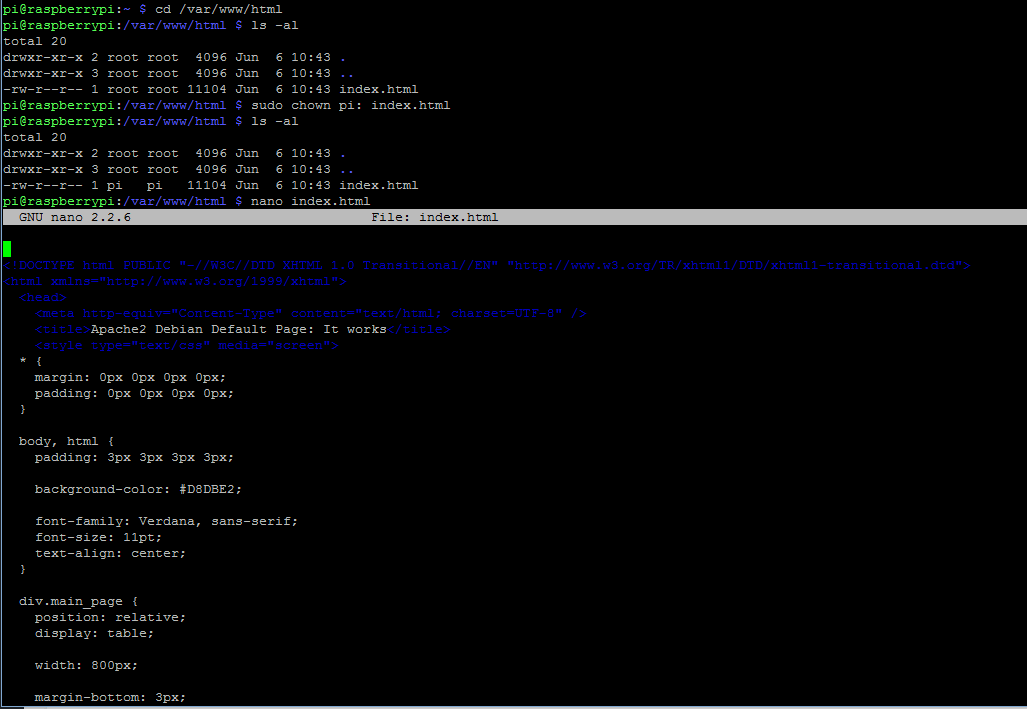
This is just the default index.html, in order to edit the page we need to adjust the permissions on the file. Log into your RPi and access the webserver folder using the following commands
ls -al

This shows you the index.html file that was presented to your browser, you will notice that it’s permissions are currently set to the root user. We need to change the user permissions if we want to make any changes to the file.
If you want to you can go and change some of the index page by entering the following command
Here you will see the HTML code for you index page, if you scroll down to the <body> section of the page you will see the writing that was presented in the browser, change some of this then press Ctrl+X, Y and enter to save the changes. If you now go back to your browser and refresh you should see your changes.
Install PHP
To download the PHP package log into your RPi via ssh and enter the following command
To confirm that it has been loaded properly we will need to create a file called index.php and put some content into it. Log into your RPi and enter the following commands.
sudo rm index.html
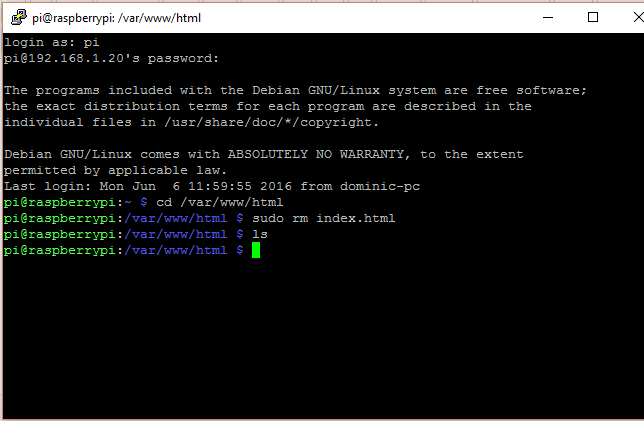
These commands will select the correct folder and then remove the existing Index.html file as that will take precedence over the new index.php file that we are going to create. To make the new file enter the following commands
<?php phpinfo(); ?> (type this into the file)
Ctrl+X
Y
Enter (save the new file)
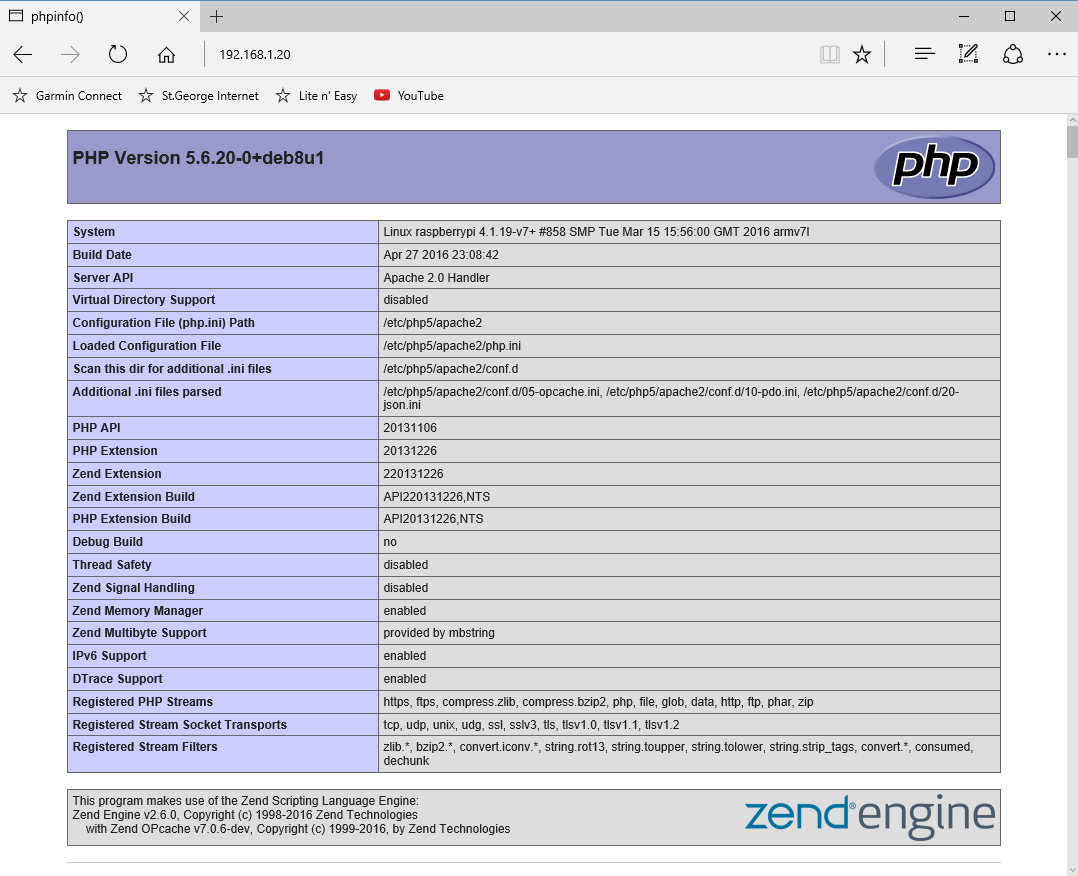
With the new file created you now need to refresh your browser to see the new php index page.
If you are still seeing the original page then you may need to restart the webserver.
sudo /etc/init.d/apache2 restart
The benefit of PHP webpage scripting is that it presents dynamic pages based on changing information, if you want to see this in action try changing your index.php file with the following entry
This will show you the current date and time, click refresh on your browser to call the index.php file and see the page update.
The MySQL Database
MySql provides us with a database to store any information we require for out website, it is used extensively with many websites on the internet today. To add this capability to our RPi we again need to load a couple of packages.
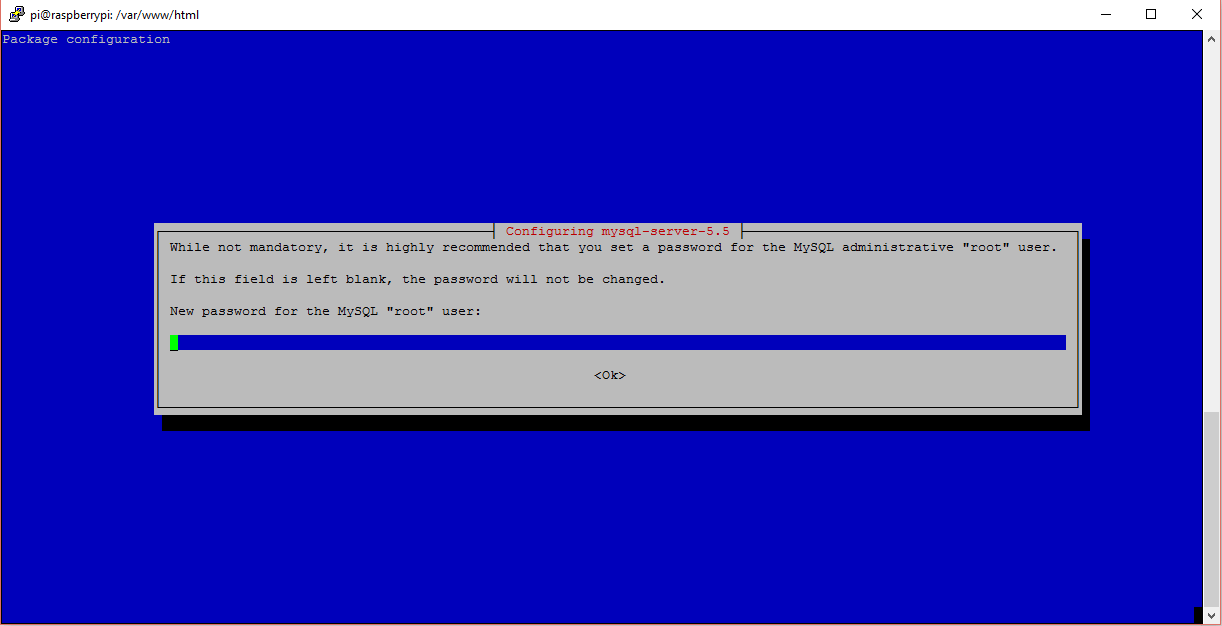
This will install MySQL server and PHP-MySQL, you will be asked for a root password during the installation, make sure that you remember this password as you will require it when you want to access the database.
To confirm that we have installed the successfully we will log into our MySQL database
Enter your password when requested and you will now see the mysql> prompt, type quit to get back to the RPi prompt.

Finally if you would like to access your MySQL database using Python commands then you will need to install the following additional software package.
All going well you have now configured your Pi with the LAMP stack and can create local webpages. If you are new to creating webpages and the coding that is involved, I suggest that you visit the W3 Schools website, this is a great free resource where you will find a wealth of information about many common web languages including, HTML, CSS, PHP, MySQL, Javascript and everything else you need to create your own websites. If your looking to take your knowledge further why not checkout this book covering all these topics in one.
If you want a website that’s available on the internet and hosted on your Pi then you will need a couple of things.
1. Your own Domain Name
2. Connection to a Domain Name Server (DNS)
DNS is like the Internets address book, allowing others to find your website by looking up your domain name. I use Namecheap as they can provide both of these services while you do the hosting yourself on the Pi. A domain name generally costs around $5-$20 a year depending on the name you choose, Namecheap also provide free DNS. Just follow the link below to their website, find an available domain name and you should be up and running in no time. If you would like a more detailed explanation of how to set up your own hosting you can follow these instructions.
If you have any thought’s about this article, improvements or errors let me know in the comments below and if you found this helpful, why not share it with others.
Wow thanks for the step-by-step instructions to setup my own web server! I’ve been wanting to host my own websites forever! You really made it easy to follow. I have been tired of paying for hosting services that were unreliable knowing I could do it myself and manage the reliability. This was just what I needed, thanks!
Glad you found it helpful Sara